


If you’ve got a hardwood floor, you have one of the most hardwearing yet attractive flooring solutions there is to be had. They’re not only hardwearing but they don’t collect or create dust, they are naturally antiseptic and their natural colour is unbeatable. However, no matter how heavy duty they are, they do require care.
If your hardwood floor has been stained or sealed, spills don’t pose too much of a problem, they can be simply wiped away with a damp cloth. Notwithstanding the durability of a wooden floor, every now and again you will need to see to your floor. When the floor begins to look worn, lacklustre or scratched, if there has been a flood and the surface has discoloured or areas by windows have started to fade, then it sounds like time to sand back the surface and apply a new coat of stain or varnish.
DIY IF YOU’RE REALLY BRAVE
Sanding a wooden floor isn’t something that can readily be taken on by anybody but the most handy DIYer. It’s not a particularly technical job, but you do need powerful, heavy and dangerous tools, protective clothing and equipment and masks. In addition to this it’s an absolutely filthy job that creates and incredible amount of noise.
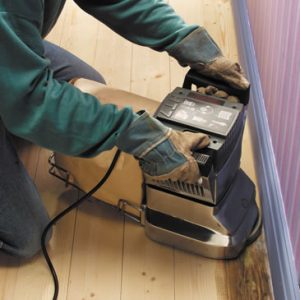
First of all you’ll need to prepare the floor or floors you need sanding. This basically involves removing all the furniture in the room. If you have floorboards you will have to make sure that all nailheads are sunk below the surface of the floor as running a floor sander over them can create sparks that will be drawn into the dust sacks, which poses a huge fire risk. If only one or two of your rooms need attention, it will also be necessary to seal all the other rooms in your house as there is an incredible amount of dust created and it WILL get everywhere.
Once you get to work sanding your floors your large sander won’t get anywhere close to the edges of the floor, to do that takes an edging sander. You need to bend over this in quite an uncomfortable position and even then, you still need to get right into the corners and details with an angle grinder fitted with a sander. You need to be careful with this around radiators and gas pipes because damage to the pipes can cause flooding or a fire.
DECADES OF DIRT AND PAINT
Depending on the size and coating your floor has, it may take several hours or even a couple of days to properly sand it back to a uniform workable surface. There was once a fashion to paint the edges of floors black and lay out a large rug instead of a wall to wall carpet. Sanding through thick paint takes many man-hours and many more changes of sandpaper as it gets choked with Victorian paint products.
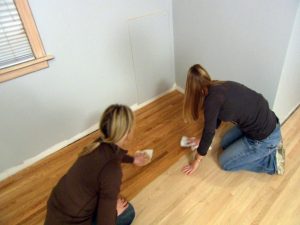
Once you’ve taken care of grinding your floor back to bare wood you get onto the cleaning stage. Vacuuming is better than sweeping as crevices and gaps may have become filled with sawdust. You’ll find that you also need to clean the walls, skirting boards, windowsills and frames, light fittings and any other projecting surface where dust can collect. Don’t forget that you’ll want to wear a dust mask for every stage of the sanding and cleaning process too.
Once you’ve done all this labour, it’s time to reapply the finish. The finish you choose is entirely up to you, however, it should be one that twill seal and protect your floor for at least a couple of years, otherwise you’ll have to carry out this job far too frequently! Several coats should be used to ensure you don’t get a patchy finish and it should be left for 24 to 48 hours before you start to move your furniture back onto the floor. If possible, try to avoid wearing shoes as your stocking’d feet will help to buff the floor.
Do remember that this process is only suitable for solid hardwood floors and really is best left to professionals who will have years of experience, the requisite tools and equipment, insurance and guarantees not to damage the floor irreparably.